Sunday, 31 December 2017

Scrap Book

Scrap Book is a beautiful way of speaking your hearts out to your loved ones. Here, you can express your feelings with the help of images or pictorials. 

1st page:
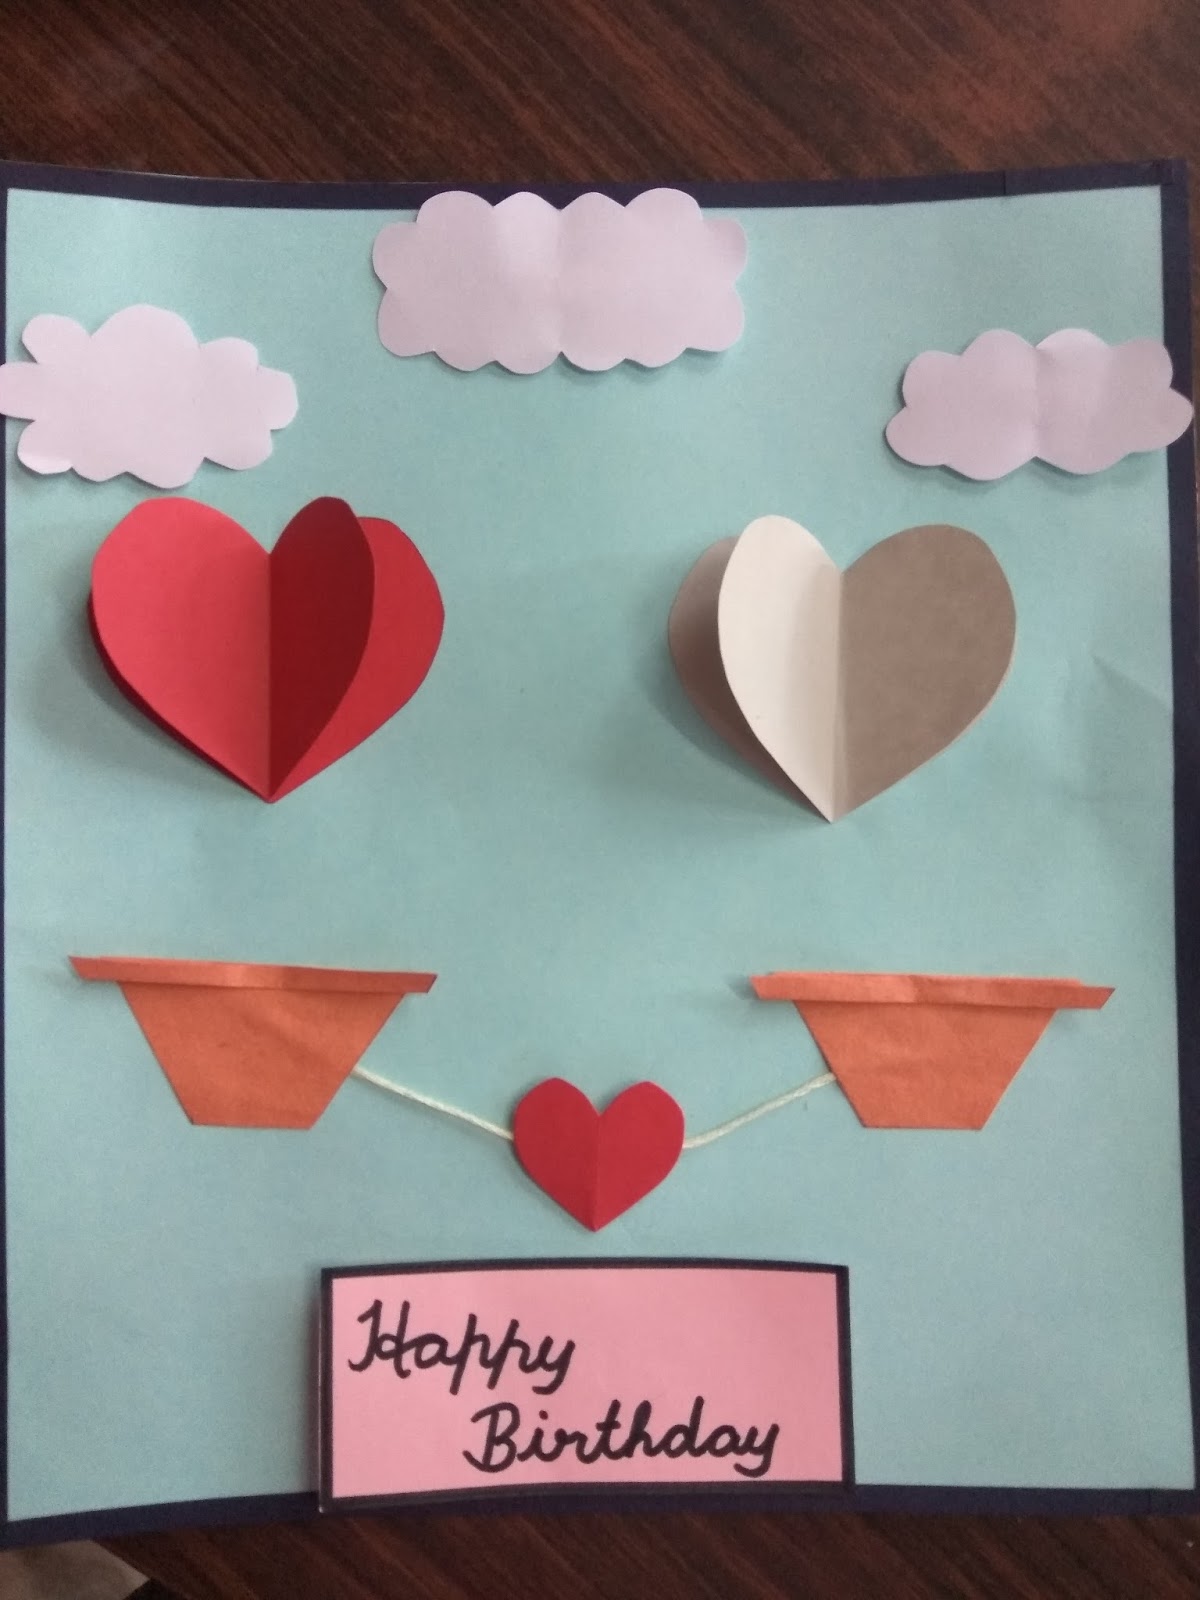
1.Take the chart paper and make 2 hearts of two different colours.
2. Stick one heart to the chart paper (fully) and take another heart and fold it into two equal halves and stick the folded part of the heart above the heart which is already attached to the chart.
3. Prepare three clouds with white paper and stick it with the help of double gum tape.
4. Similarly prepare the pots and a small heart and connect the small heart with the two pots using threads.
5. To make it look attractive, you can add borders to it.

2nd page:
Candle:
6. Take colour papers and roll it and stick the edge of the colour paper with the help of a glue.
7. Take six threads of 2 cm each and attach it to the candle at the top.

3rd page:
8. Take colour papers and cut it into thin strips and stick it to the chart paper.
9. Take small colour papers and write code words on it and stick it to the chart paper with the help of double gum tape.

4th page:
10. Write the wordings in white thin strips and stick it to the chart paper.
11. Take red colour paper and make small hearts out of it and stick it to the chart paper.

5th page:
12. Take 2 buttons and stick to the colour paper.
13. Now, you can draw the picture of the boy and the girl holding hands together
Last page:
14. Take chart paper and cut it into thin strips. To make it look attractive, you can make borders for it.
15. Take popsicle sticks and stick at the backside of the thin strips.
16. Finally, you can write in it.
17. After the sticks are ready, you can take another chart paper and make a holding to the thin strips.

After doing all these, the last step is to attach all these pages together. For this,  you need to make 2 small holes with the help of a punching machine and tie it using a ribbon. 

Chocolate Bouquet

Do you want to surprise your loved ones by gifting them with chocolates in a different way? Here's an amazing idea for you all. Instead of gifting chocolates in boxes, why not give them in a form of bouquet. Isn't it different? Your loved ones will definitely start admiring at you by looking at your level of creativity.


Requirements:
15 Nestlé Munch chocolate (any other chocolate of your choice), chart paper, double sided gum tape, 1 sheet of bouquet wrapper, gum tape and ribbon.
Steps:
1. Take the chocolate and stick it on the chart paper with the help of double sided gum tape in an inverted triangular shape.
2. After attaching the chocolates, fold the chart paper in the form of a cone and stick it with the help of a gum tape.
3. Take the bouquet wrapper and place it below the folded chart paper.
4. Cover the folded chart paper with the help of the bouquet wrapper.
5. Attach the ribbon to the bouquet to give it an attractive look.

Finally, your bouquet is ready! Isn't it easy to prepare and attractive to look.
You can even prepare this bouquet in a different way using your creativity.

Monday, 25 December 2017

Photo frame

Requirements
Newspaper, small size stiff bound book, glue, red colour paint, chart paper, double sided gum tape, scissors
Frame:
Steps:
1. Take a small size stiff bound book and remove the entire pages from it.
2. Mark the place where the photo will be placed and remove the excess part.
3. Cover the inner and outer part of the stiff bound with the help of chart paper with the colour of your choice.

Flower (rose)
Steps:
1. Take newspaper and roll it thinly. Cover the edge of the newspaper with the help of a gum.
2. Let the length of the newspaper rolls be of different sizes. Because the flowers will be of different sizes.
3. Now, from the edge bend the newspaper rolls and make it into circular shape. Apply glue at the edge of the flower.

Final attachment:
Steps:
1. Take the flowers and stick it to the entire edge portion of the photo frame. You can stick it with the help of a glue of a double sided gum tape.
2. After the entire portion of the edge is covered with paper flowers, paint with without adding water.
3. After the paint has been dried, stick the photo to the frame from inside.

The photo frame will be in landscape format.
See through that the opening part of the book will be facing down.